|
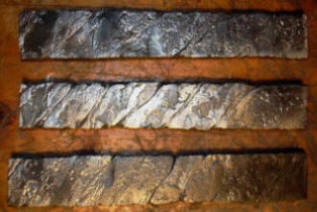
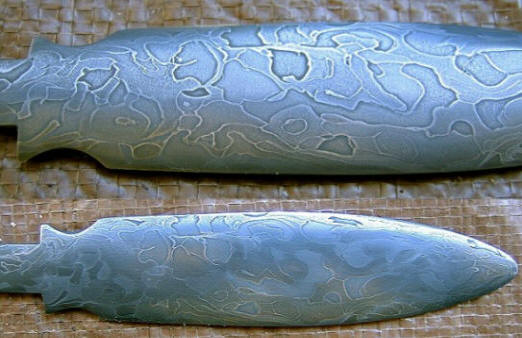
Damascus or Pattern Welded steel is an ancient process that traces it's
roots to India, thousands of years ago. The process as practiced today involves taking different
steels, and even pure nickel, and combining them together via a process
called forge welding. This is done by mating the metals carefully,
bringing them up to forging heat, using some anhydrous borax as flux,
and tapping them lightly with a hammer to set the welds. Once the welds
are solid, the monolithic piece of metal may be worked as desired. I
fold, twist, and continue to forge weld, in order to create the patterns
that I achieve in the finished blades.
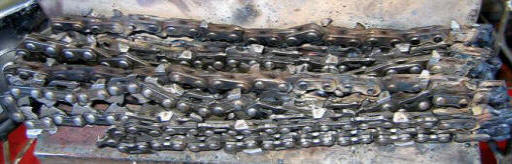
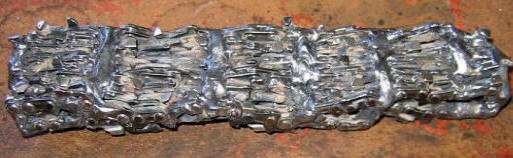
I enjoy working with various materials,
including steel cable and chainsaw chain, in order to make some unusual
and interesting patterns. Since I do this by hand, it is very time
consuming and I don't make a lot of hand forged Damascus blades. It also
adds to the cost of the finished knives.
|
|
Creating
a Visible Temper Line (Hamon)
This is an ancient
technique, perfected by the Japanese during the height of the
Samurai era, for creating a differentially tempered blade. In making
a blade, you strive, during heat treating, to reach a balance
between hardness and toughness. The harder a blade is, the keener
edge it will take and hold. However, too hard and it will snap, or
at the very least, the edge will chip. Toughness is the opposite of
hardness, hence why a blade is tempered after achieving maximum
hardness, to make it more durable and not as prone to breakage. It's
not as critical in knives, due to the shorter length, but in swords
it was everything. The Japanese did this differential tempering via
packing refractory (heat resistant) clay onto the spine of the
blade, thereby preventing it from heating up as much as the edge,
and also slowing it's cooling in the quench. This is a careful,
time-consuming process, and works much better on simpler (less
alloyed) steels than it does on the newer, fancier cutlery steels. I
do this from time to time, in order to create the highest performing
blade I can. If you do it correctly, you end up with a blade that's
rock hard at the edge and dead soft at the spine. The different
grain structures created in this way will show a visible temper
line, or hamon.
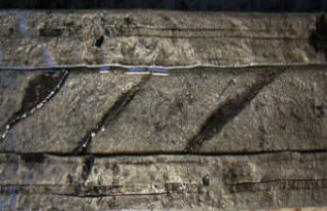
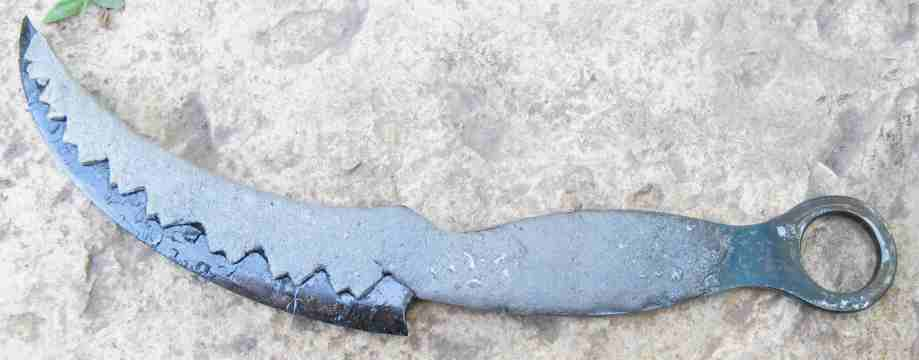
Here is an upswept
skinner blade, made of 1095, finish ground and hardened, showing the
clay on the spine. It was hardened in oil, hence the black coating
on the blade:
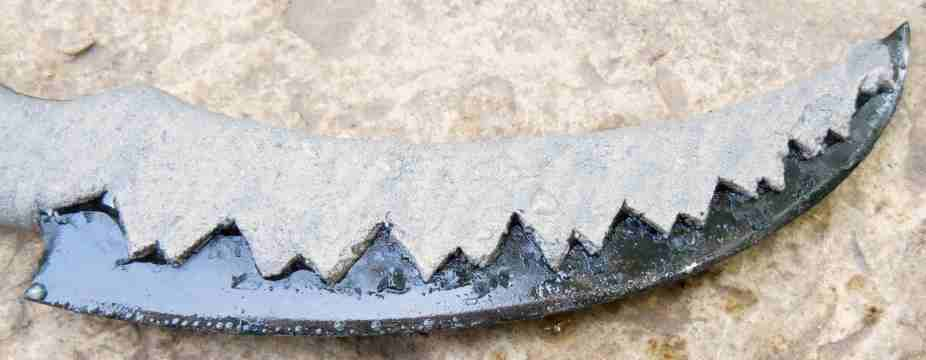
Another
pic, showing the entire blade:
Off with
the clay and clean it up. The pattern you see is surface
decarburization. This is a loss of carbon at the surface that
happens when the oxygen in the air combines with the steel during
the heating. Although it's pretty, it needs to be ground off to get
to the pure steel inside:
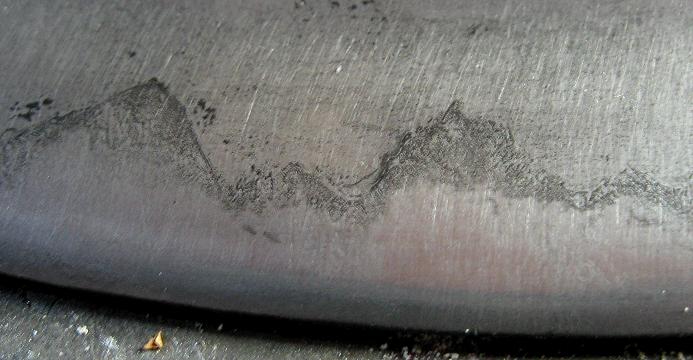
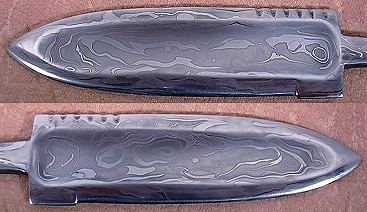
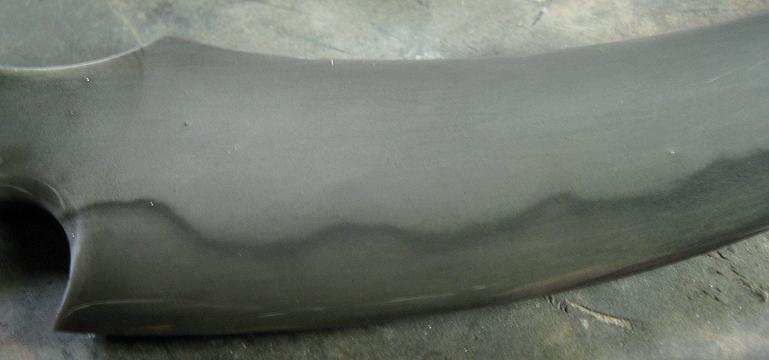
Decarb
ground off, with the blade etched to show the hamon:
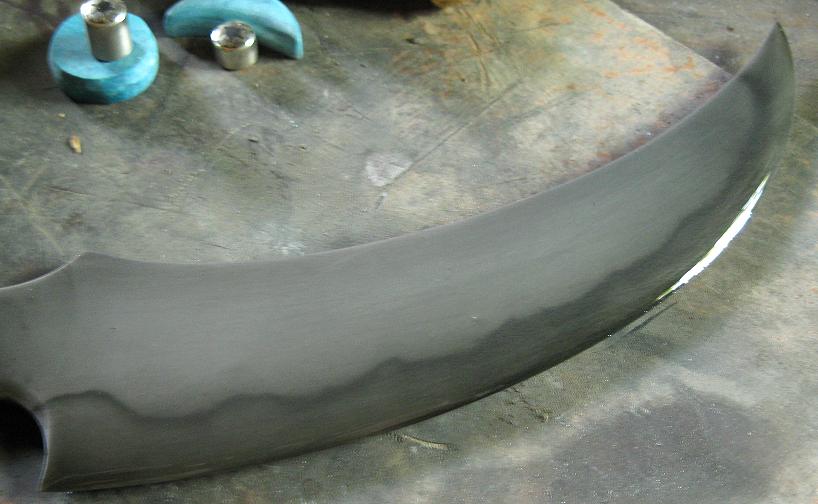
Decarb
ground off, with the blade etched to show the hamon, another pic:
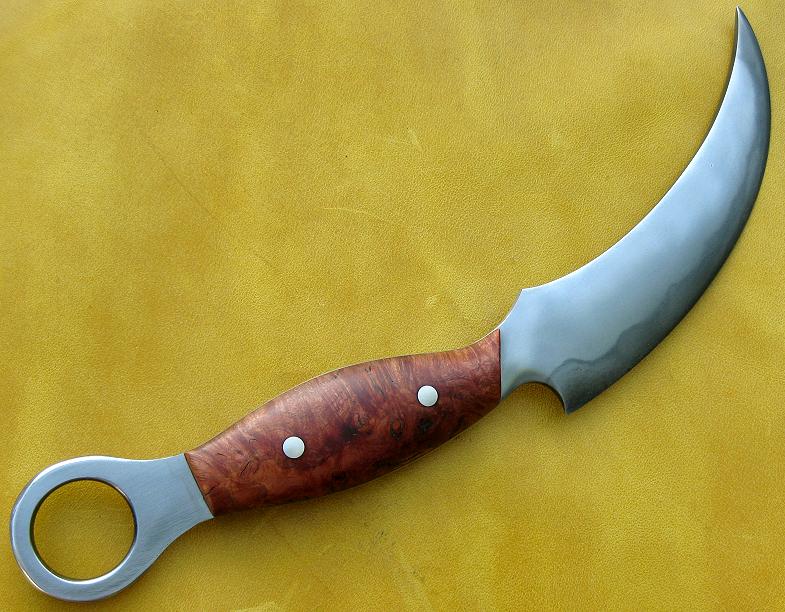
The
finished knife:
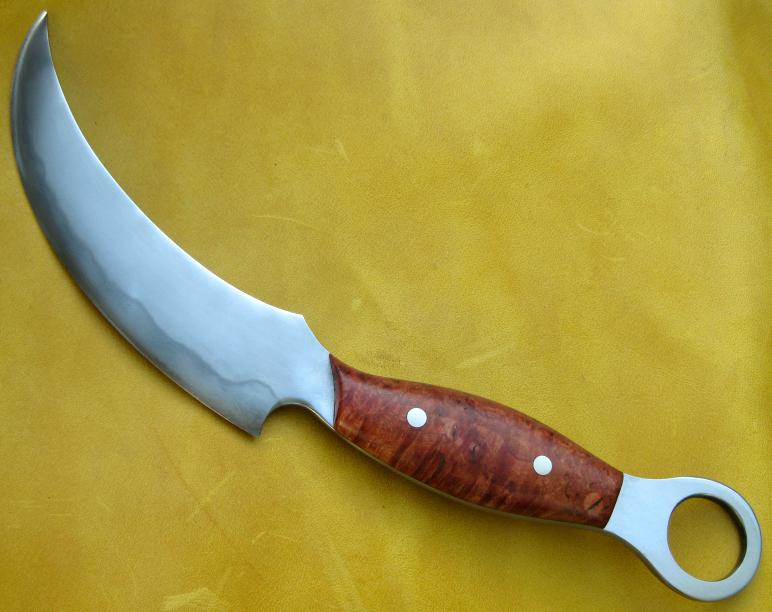
Rear
view. It worked well, the knife has a super hard edge and soft
spine, and I was able to get a nice hamon:
|
|
Wood Selection and
Stabilization
I've spent a lot of time sourcing the
finest possible selection of high quality exotic hardwoods from around
the world and have over 60 varieties in stock. I strive to only use
suppliers that sell sustainably harvested wood from non-endangered
species. Curing some of these woods is quite challenging. Snakewood, for
one, is one of the most difficult woods to cure correctly, to prevent
it's natural tendency to check (small cracks appearing). When a green
log is cut, to prevent any further curing you can coat the piece
entirely with paraffin wax, especially the ends. The end grain is where
most of the moisture escapes from as wood is curing. If you want to
achieve gentle, controlled curing, you coat the piece of fresh cut wood
with shellac, which is porous and will allow slow curing. Some woods are
extremely stable (Bubinga, for example), and may simply be cut and set
aside to age. Most all of the woods I have in stock, I have had here in
my shop for anywhere from 6 months to 2+ years, so they have all been
aged to ambient moisture content, and are ready to use.
Some woods are fully stable as is, and
some benefit from a process called stabilization. I've sourced a
proprietary chemical called Nelsonite, which was developed specifically
for the process of stabilizing wood. Pool cue manufacturers use it, as
does Scagel and other well known knifemakers. The chemical is carried in
a Xylene solvent and the wood block, once cut, is then soaked in the
Nelsonite for several days. The chemical makes it way into the wood,
displacing the natural moisture and saturating the fibers. After
soaking, the wood is air dried for several days to several weeks,
allowing the Xylene to evaporate, leaving the Nelsonite inside the wood
cells. What this does when the wood is used on a knife is to greatly
prevent the wood from either absorbing or releasing moisture as it
normally would, making it much more stable. Some woods do not need
stabilization and indeed will suffer from it. Ask me about stabilizing
woods, I can do that for you, should the wood need it, for a nominal
extra charge. One of the major benefits of this method of stabilization
is that the wood is left natural feeling, and will accept oil and wax
finishes readily, whereas some of the more common methods rely on
injected polymers, and leave the wood with a plastic like feeling and
finish. |